There's pretty much 2 ways (which are essentially the same) that Roundmaille can be seamlessly joined.

Weave cells of Roundmaille are made up of 6 rings, 3 direct and 3 inverted (for our example, we're going to use red and blue):
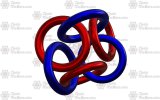 Depending on if you're weaving to the left or weaving to the right defines which rings are direct and which are inverted.
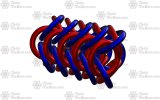
Put a few weave cells together (in either direction )and you have this:
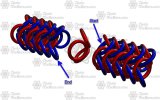
Method One works no matter which direction you are weaving as you are adding a complete weave cell to join the 2 ends. Method one is useful when you already have a complete chain and don't want to open any already connected and closed rings. This method will increase the length of your chain and can only be used if your chain is made up of complete weave cells (a multiple of 6 rings).
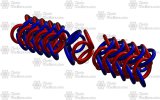
That will give you this (note that there are now 11 weave cells):
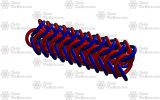
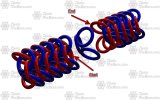
Method Two changes depending on which direction you are weaving. It's useful when you have a specific length to make, haven't completed weaving your chain yet, or do not have a chain made of complete weave cells. Method Two is essentially the same as method 1, but without the initial adding of the 3 rings to one end of the chain (you're only adding 3 rings instead of 6).
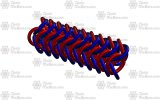
That will give you this (note that there are still 10 weave cells):

Weave cells of Roundmaille are made up of 6 rings, 3 direct and 3 inverted (for our example, we're going to use red and blue):
 Depending on if you're weaving to the left or weaving to the right defines which rings are direct and which are inverted.
- Weaving to the right, you would start with the blue (direct) and then invert the red (inverted).
- Weaving to the left, you would start with the red (direct) and then invert the blue (inverted).
Put a few weave cells together (in either direction

Method One works no matter which direction you are weaving as you are adding a complete weave cell to join the 2 ends. Method one is useful when you already have a complete chain and don't want to open any already connected and closed rings. This method will increase the length of your chain and can only be used if your chain is made up of complete weave cells (a multiple of 6 rings).

- Add 3 rings to one end of the chain.
- If you added blue, connect 1 red to 2 new blue and 2 blue from the opposite end (repeat 2 more times).
- If you added red, connect 1 blue to 2 new red and 2 red from the opposite end (repeat 2 more times).
That will give you this (note that there are now 11 weave cells):

Method Two changes depending on which direction you are weaving. It's useful when you have a specific length to make, haven't completed weaving your chain yet, or do not have a chain made of complete weave cells. Method Two is essentially the same as method 1, but without the initial adding of the 3 rings to one end of the chain (you're only adding 3 rings instead of 6).

- When weaving to the right, the 3 red rings that would complete the final weave cell are used to join the 2 ends of the chain.
- Connect 1 red to 2 start blue and 2 end blue (repeat 2 more times).

- When weaving to the left, the 3 blue rings that would complete the final weave cell are used to join the 2 ends of the chain.
- Connect 1 blue to 2 start red and 2 end red (repeat 2 more times).
That will give you this (note that there are still 10 weave cells):

